Sanding Wooden Worktops: A Worktop Express® Nutshell Guide
If you are purchasing worktops from us and are not opting to take advantage of our bespoke cutting service, you may think that a great deal of work is required prior to installation – but we’re pleased to say that it isn’t!
Our kitchen worktops are supplied sanded to a 150 grit finish as standard, a pleasing smoothness (the industry standard is just 120 grit); which means that the only additional action you need to take to ready the timber for installation is to apply several coats of Rustin’s Danish Oil.
That said, we appreciate that customers may wish to sand the worktops further prior to or after installation; or, alternatively, you may wish to sand your worktops again in future as part of your maintenance programme – so we thought it would be helpful to provide some additional advice on sanding wooden worktops to a beautiful finish.
If intending to sand your worktop prior to installation, we recommend allowing your worktop to sit in the room of installation for 48 hours; this is so that the worktop can adjust to its new climate (it will experience a range of conditions during transit).
You can either sand your real wood worksurfaces by hand, or using an orbital sander, but we do not recommend belt sanders as it is very difficult to get an even finish on the worktop. If using an orbital sander, this should only be as a precursor to additional sanding by hand.
To sand your wooden worktop:
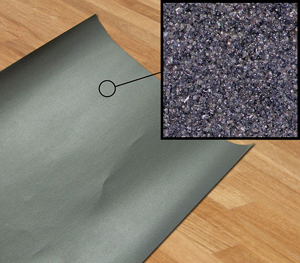
- Start with 150 – 180 grit sandpaper, and rub down the entire worktop, including the edges.
- Once you have gone over the entire worktop, use a cloth and vacuum to remove sawdust from the work surface and surrounding area.
- When you are happy that the worktop is free from dust, you can then move onto a finer grit sandpaper and repeat the process.
- For the smoothest finish, it is recommended to sand the worktop 3 or 4 times (with paper of up to 400 grit).
- To ensure your worktop is clean once you are happy with the smoothness of the finish, we would then recommend that you vacuum the worktop and surrounding area, then wipe the wooden worktop down with a slightly damp, lint-free cloth to remove any remaining dust.
- Your worktop is now ready for the application of your chosen treatment – we recommend Rustin’s Danish Oil.
To learn more about this process, please consult our information guide on repairing minor kitchen worktop damage:
And finally… If sanding your worktops at any point, please remember to apply several coats of oil to the face and edges (and more to the endgrains) after you have finished. To find out exactly what is required to oil your worktops effectively ,please read our guide on oiling wooden worktops.
Buy Your Sanding and Installation Accessories from Worktop Express:
Please note: This guide was originally posted on 11th November 2014 and was updated on 8th February 2018 to include additional information.
8 Responses to “Sanding Wooden Worktops: A Worktop Express® Nutshell Guide”
Leave a Reply
I consent that Direct Online Services LTD may use the personal information I have provided to reply to your comment or enquiry, and that your comment may be published by us, alongside your name, on our website.
If you wish for your comment to be removed, you may withdraw your consent at any time by contacting us. Our privacy policy can be found in the footer below for further information.
Hi
I would like to have me timber kitchen workbench re-sanded. Can you assist?
Thanks
Charles
Hi Charles,
Thanks for your comment regarding workbench sanding.
We unfortunately do not offer a sanding service, and can only recommend that you follow the details in this information guide.
Sanding can either be done by hand or using a powered orbital sander, if the worktop needs heavy re-finishing.
Kind regards,
Ben @ Worktop Express
Hi,
Can anyone please help me. We have left a bottle of bathroom cleaner on the kitchen worktop over night (only had our beautiful kitchen fitted 2 weeks ago and i want to cry!!). It has left an unsightly greenish / black mark on the worktop, about the size of a coaster.
Can anyone please help as to how we can remove this mark please?. I feel like crying everytime i look at it.
Thanks in advance.
Stacey
Hello Stacey,
We are sorry to hear that you have damaged your new worktops – hopefully the issue can be resolved in a few simple steps. Assuming that this is a wooden worktop, the best course of action will be to sand the damaged area until the damage is no longer visible. Once the mark has been removed, layers of oil can be applied to provide an even finish and ensure the worktop is protected. To avoid a patchy finish, the area around the mark may also need to be sanded and re-treated, but this will depend on the level that the cleaner has penetrated the worktop.
Kind regards,
Stephanie @ Worktop Express
Hi,
Can you help?I’ve had s similar issue with bleach causing stain on my worktop.
I have sanded to remove the stain, however when I reapply oil this leaves a patchy finish where I have sanded. You mention I might need to re-treat the area in the previous post, how do I do this? Reccomendations?
FYI my bench came pre oiled, I have applied additional coats over the past year.
Many thanks,
Hayden
Hello Hayden,
Thank you for getting in touch. The patchy finish may be due to the inconsistent layers of oil across the entire worktop. When we say ‘re-treat’ we just mean that where the worktop has been sanded down, the same treatment applied to that as it has been to the rest of the work surface.
In the first instance, we recommend applying subsequent layers of oil to the area that has been sanded down to try to build to a consistent level. If this does not work, it may be necessary to sand down a larger area and reapply oil to refinish.
Kind regards,
Stephanie @ Worktop Express
Hi,
Hoping you can help please.
We’ve used a handyman to sand and oil our
oak worktops. As part of the same job whilst he was here we also asked if he could dye and oil our wooden floors which were showing wear. Unfortunately, and I don’t know how, the instructions were misconstrued and he’s ended up sanding and dyeing the worktops, rather than liking them. Arrrghhh!!! They look awful and are now several shades darker than their original colour. Help!!! Can we sand out the wood dye? I’m fearing the worst.
Thanks very much for your help.
Mark
Hello Mark,
Thank you for getting in touch – we are sorry to hear about the mix up with your handyman. You may be able to sand the dye out, we recommend sanding a small area of the work surface first to see how easily the colour can be removed. If the dye has penetrated the wood too far to sand out, your best option may be to replace the worktops.
Best of luck in rectifying this issue, please let us know if you have any further questions.
Kind regards,
Stephanie @ Worktop Express