Order Custom Worktops Easily
Thanks to the Worktop Express® Bespoke Worktop Tool User Guide!
The power to create your dream worktop is now at your fingertips!
For optimum performance, we'd recommend that you use either Google Chrome or Apple Safari browsers. Our tool is designed to work on both desktop and tablet devices.
Please be assured that safeguards are in place to ensure that you do not order and pay for a bespoke worktop by mistake. Once you have completed your design you will be taken to your bespoke worktop diagram, at this point, you will be required to check the diagram thoroughly to ensure that you are happy. You can return to your design to make any changes that are needed and once you are fully happy with the diagram you can confirm and pay. After you have paid we will book your bespoke order into production and send you an email with the delivery date.
Of course, if you have any questions, please do not hesitate to contact our fabrication team directly by using the live chat button on the tool (shown in the bottom right hand corner), or by sending us a message. We look forward to receiving your order!
We recommend that you select fabrication process options from left to right when completing your design (i.e. start at cut-to-size).
When you have opened the bespoke online worktop tool, you must first select either wooden or laminate worktops to allow you to select the specific worktop you would like to purchase.

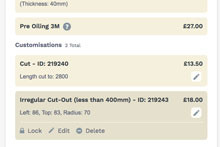
The specification of your worktop will be updated with each change you make and will be shown in the right hand panel, along with a cost summary.

To change the editable section of the worktop, you can either press the left/right buttons in the bottom left hand corner, or drag the toolbar at the bottom. The worktop is viewed from above, in a 'plan' / 'birds eye' view, to ensure accuracy at all times.

The fabrication item that is currently active will be displayed at the bottom of the right hand panel.

If you'd like to undo your work at any point, simply left click on the fabrication item that you have added to the worktop (a radius corner in situ on the worktop, for example) and then press the 'delete' button that appears in the bottom right hand toolbar. You will be asked to confirm, before this action is completed. Click OK to continue, or cancel to keep the item.
Butt join cut-outs need to be added to each worktop before visiting the arrange/join screen. Only standard butt joins (in default locations) can be created on the tool (worktop edges, for example). For custom dimensions, contact us and we will compose a bespoke quotation.

Once a fabrication item has been added to the diagram, the item can be locked to secure its position, by pressing the button in the right hand panel. Please note, due to the built in 'lock' tool that has been added to prevent accidental movement of an item that has already been placed in position, if it appears that a fabrication item gets stuck (i.e. the item is selected in the navigation and you try to move it, but it doesn't move), simply click the unlock button in the right hand panel. You should now be able to move the item.
If you are attempting to place an item in a position that cannot be fulfilled, it will turn red.

Adjacent to the 'lock' button is the 'align' button. You can use this to align a fabrication item vertically or horizontally to another. This is very useful for aligning tap hole cut-outs to sink cut-outs, for example.
Please note, for positioning of circular elements, the measurement shown will be to the central point of the cut-out (and not the edge of the cut-out, as will be the case with non-circular shapes).

Safety margins: for structural rigidity, a margin of at least 40mm is required from each worktop edge, for all cut-outs. The only exception to this rule occurs with the square or circular cut-outs, as these can be used to create custom shapes where required, such as pipe cut-outs or scribing.

Save feature: we have developed a handy 'save' feature that will allow you more freedom whilst designing your custom worktop. Please take your time and play around with the design, pricing up different worktop customisations as you go - but don't forget to save! This way you can return to saved designs later on or discard as necessary when you are ready to order.

If you experience any bugs or issues with a single fabrication process option on the tool (for example it appearing red or not functioning as it should), we would recommend deleting the fabrication process option and then re-adding it. Please contact us if this happens so we can try and fix the tool for the next user!
1. Select a worktop type, and then select a worktop. If this is your first visit, use the right hand panel to add your first worktop. Select either wood or laminate, and then you will be able to select the timber species or laminate decor required, before pressing 'confirm' (or skip for later if you are undecided). Then, select the thickness and size. Finally, press confirm. Alternatively, if you have visited previously and want to retrieve a saved drawing, click 'load' to return to a previous session.
2. Cut the worktop to size. Choose whether you'd like to cut the length (from the right hand side) or the width (from the bottom). Next, input the size that you'd like the resultant worktop to be (remember that you are not selecting how much you'd like to cut off, but rather what size you'll be left with!). Then, decide whether you'd like to save the offcut; in which case it can be further customised accordingly. Please keep in mind that 5mm of worktop is lost for each cut that is carried out, due to the blade thickness of our machining tool. All offcuts of a reasonable size are sent with every order at the despatch stage, so please let us know if you do not require your offcut. Finally, press the blue 'Confirm' button to proceed.

3. Add radius corners. First, enter the size of the radius required (in mm, minimum size 12mm). Next, select the worktop corner (or corners, you can select more than one) that you would like the radius applied to. Finally, press the blue 'Confirm' button to proceed.

4. Add a Square or circle cut-out. First, choose whether you would like to make a square or circle cut-out. If you have chosen square, then you will need to enter the position of the cut-out, by inputting the distance from both the left and top edge. Then, enter the dimensions of the cut-out (length and width). Finally, press the blue 'Confirm' button to proceed.
If you have chosen circular, then you will also need to enter the position of the cut-out, by inputting the distance from both the left and top edge. Please note, for positioning of circular elements, the measurement shown will be to the central point of the cut-out (and not the edge of the cut-out, as will be the case with non-circular shapes). Then, enter the diameter of the circular cut-out. Finally, press the blue 'Confirm' button to proceed.

5. Add a Tapered cut to an edge. First, select the worktop edge that you would like to taper. Then, select the corresponding corner on that edge, that you would like to remain intact. Now, enter the dimension that you would like the opposite corner on that edge to be reduced by. Finally, press the blue 'Confirm' button to proceed. This dimension will determine the size of the taper. Please ensure that the worktop is cut to the required size before adding the tapered cut.

6. Add a Sink cut-out. First, select the type of sink cut-out required, from Belfast / Undermounted / Overmounted.
Belfast Sink cut-out. Select the worktop edge (side) that you would like to position the sink (Belfast sinks sit at the front of the worktop edge). Then, enter the position of the cut-out from either the top or left hand edge, depending on which worktop edge you chose. Next, enter the length and width of the cut-out. Now, enter the radius of the internal corners of the sink cut-out, and ensure that the edge profile selected is correct, to finish the internal edge of the worktop adjacent to the sink. Finally, press the blue 'Confirm' button to proceed. Then, you will need to decide whether to add drainage grooves, or not. You can select the type, length, choose between a single or double set, and if you selected a single set then you will need to confirm the orientation (to the left or right hand side of the sink). Press the blue 'Confirm' button to add drainage grooves, or the red 'I don't require drainage grooves' button if not.
Undermounted Sink cut-out. If you are adding a cut-out for a specific sink make / model, please select this from the 'Sink range' dropdown. This will prefill the sink specification (length, width, corner radius) for you. Then, enter the position of the cut-out, by inputting the distance from both the left and top edge. Next, ensure that the edge profile selected is correct, to finish the internal edge of the worktop adjacent to the sink. Finally, press the blue 'Confirm' button to proceed, and skip the paragraph beneath to view 'Adding Drainage Grooves'.
Alternatively, if your sink make / model is not listed, or you would like to add a bespoke sink, please select 'Custom Sink' from the 'Sink range' dropdown. Then, enter the position of the cut-out, by inputting the distance from both the left and top edge. Next, enter the length and width of the cut-out, and enter the internal corner radius of the sink cut-out. Now, ensure that the edge profile selected is correct, to finish the internal edge of the worktop adjacent to the sink. Finally, press the blue 'Confirm' button to proceed.
Please note: if you intended to work from a manufacturers' sink template but this is not listed, simply enter approximate dimensions of the sink in question and add the specific sink make/model to the order during the 'notes' section at checkout. Post order, our fabrication team will confirm all requirements and issue a separate diagram via email for you to check and confirm before we proceed with any cutting.
Adding Drainage Grooves For any undermounted sink you will need to decide whether to add drainage grooves, or not. You can select the type, length, choose between a single or double set, and if you selected a single set then you will need to confirm the orientation (to the left or right hand side of the sink). Press the blue 'Confirm' button to add drainage grooves, or the red 'I don't require drainage grooves' button if not.
Overmounted Sink cut-out. First, choose whether you would like to make a rectangular or circle cut-out.
Rectangular: you are adding a cut-out for a specific sink make / model, please select this from the 'Sink range' dropdown. This will prefill the sink specification (length, width, corner radius) for you. Then, enter the position of the cut-out, by inputting the distance from both the left and top edge. Alternatively, if your sink make / model is not listed, or you would like to add a bespoke sink, please select 'Custom Sink' from the 'Sink range' dropdown..
Then, enter the position of the cut-out, by inputting the distance from both the left and top edge. Next, enter the length and width of the cut-out, and enter the internal corner radius of the sink cut-out (if applicable). Finally, press the blue 'Confirm' button to proceed.
Circular: if you are adding a cut-out for a specific sink make / model, please select this from the 'Sink range' dropdown. This will prefill the sink specification (length, width, corner radius) for you. Then, enter the position of the cut-out, by inputting the distance from both the left and top edge. Please note, for positioning of circular elements, the measurement shown will be to the central point of the cut-out (and not the edge of the cut-out, as will be the case with non-circular shapes). Alternatively, if your sink make / model is not listed, or you would like to add a bespoke sink, please select 'Custom Sink' from the 'Sink range' dropdown.
Then, enter the position of the cut-out, by inputting the distance from both the left and top edge. Please note, for positioning of circular elements, the measurement shown will be to the central point of the cut-out (and not the edge of the cut-out, as will be the case with non-circular shapes).Next, enter the length and width of the cut-out, and enter the internal corner radius of the sink cut-out (if applicable). Finally, press the blue 'Confirm' button to proceed.

7. Add a Tap Hole cut-out. First, enter the position of the cut-out, by inputting the distance from both the left and top edge of the worktop. Please note, for positioning of circular elements, the measurement shown will be to the central point of the cut-out (and not the edge of the cut-out, as will be the case with non-circular shapes). If you want to align the tap hole cut-out to the center of a sink, for example, you can do this easily once you have confirmed the size (read on). Then, enter the diameter measurement of the desired cut-out (35mm will be selected as default - please check the required cut-out information relevant to your tap). Finally, press the blue 'Confirm' button to proceed.
If you want to align the tap hole cut-out to a separate cut-out, for example to align it to the centre of a sink, simply click on the tap hole cut-out once you have added it. Then, in the bottom right hand corner, click the blue 'Align' button. Now, select the object that you would like to align the tap hole cut-out to, and decide whether to align it horizontally (left-to-right) or vertically (top-to-bottom). Finally, press the blue 'Confirm' button to proceed.

8. Add a Hob cut-out. First, choose whether you would like to make a square or circle cut-out. If you have chosen square, then you will need to enter the position of the cut-out, by inputting the distance from both the left and top edge. Then, enter the dimensions of the cut-out (length and width). Finally, press the blue 'Confirm' button to proceed.
If you have chosen circular, then you will also need to enter the position of the cut-out, by inputting the distance from both the left and top edge. Please note, for positioning of circular elements, the measurement shown will be to the central point of the cut-out (and not the edge of the cut-out, as will be the case with non-circular shapes). Then, enter the diameter of the circular cut-out. Finally, press the blue 'Confirm' button to proceed.

9. Add a Hotrod set. First, select the hotrod set required and press the blue 'Confirm' button to proceed. Please note - once you have positioned the hotrods on the worktop, you can click and drag the lower black circle to rotate the orientation of the hotrod set. The hotrods are shown as an opaque colour, as they are rebated into the worktop, and sit proud.

10. Add an ellipse end. First, select the worktop edge(s) that you would like to apply the ellipse end to. You can select both edges, if required. Then, enter the depth of the ellipse. Finally, press the blue 'Confirm' button to proceed. For a custom ellipse that spans the length of the worktop (rather than the width), please contact us via email for a bespoke quotation.

11. Add an edge profile. First, choose the type of edge profile required. Then, select the worktop edge(s) that you would like to apply the edge profile to. You can select more than one edge at once, if required. Please note, if you have already applied a curved fabrication process option to an edge - such as an ellipse end or a radius corner - then you will be prompted to continue the edge profile along the adjacent edge of the worktop. Finally, press the blue 'Confirm' button to proceed.

12. Add an end cap. First, select the worktop edge(s) that you would like to apply the end cap to. You can select more than one edge at once, if required. Finally, press the blue 'Confirm' button to proceed.

13. Add a butt join cut-out. First, choose the location that you would like to place the butt join cut-out. Then, press the blue 'Confirm' button to proceed. The butt join cut-out is shown as an opaque colour, as it is rebated into the underside of the worktop.
Next, switch the view to the second worktop that you will be joining to, and add a butt join cut-out here as well. If ordering multiple worktops, these steps need to be completed before you can join or arrange the worktops accordingly.
Please note - we can only process standard butt joins in predetermined locations through the tool, as displayed on the butt join cut-out screen. Also, the minimum width of a worktop that can be joined on the tool at present is 516mm. For custom dimensions, please contact us via email directly for a bespoke quotation.
14. Add additional worktops. If you would like to customise additional worktops, click on the 'Add Worktop' button in the navigation bar at the top of the screen. You can select worktops of a different wood type, thickness and size accordingly. Then, continue from step 2 and customise accordingly.
15. Save your design. If you are not quite ready to order, and would like to save your design so that you can retrieve it at a later date, click on the 'Save Design' button in the navigation bar at the top of the screen. Before saving, we recommend that you 'lock' all of your customisation items to ensure that they remain in the same place upon retrieval. Please also make a note of your drawing reference number, which is presented in the right hand panel after you click 'Save Design'.
16. Load your design. If you have previously saved a design, simply click the 'Load Design' button to retrieve it. Enter your email address and worktop reference number, and then press the blue 'Retrieve Worktops' button to proceed. If you don't have a worktop reference number to hand, please check your email account, as this will have been emailed to you shortly after you saved your previous design. Alternatively, please contact us and we will do our best to locate your design and provide the reference number.
17. Arrange / Join your worktops. If you have added butt join cut-outs to the design, simply click here to arrange / join them before checkout. Please ensure that your butt join cut-outs have been added to each worktop before you proceed. After clicking the button, you will be taken to the 'Arrange / Join' screen, which dispays miniature versions of your worktops. Now, click and drag your worktops into place so that the cut-outs align. You can use the blue 'Rotate' button in the top right hand corner of the display window to rotate your selected worktop by ninety degrees, if required. If you are attempting to position a worktop in a place that cannot be fulfilled, the worktop will be outlined in red. Finally, when you have finished joining, simply click on the blue 'Return to edit mode' button, displayed in the right hand panel.
18. Place you order. When you have completed your design, simply click the large green 'Place Order' button, in the top right hand corner of the page. To ensure that you don't lose any unsaved work, you must enter your email address in the right hand panel before you can checkout. Simply enter your email address, and then press the green 'Place Order' button. You will now be transferred to our website checkout. There is an option during the checkout process to add any guidance notes, if necessary.
Now that you have submitted your order, our fabrication department will review it, ensure there are no issues then book the order into production.
We will then email you with a delivery date, at present, the standard delivery time for such orders is 6 - 9 working days from receipt of confirmed diagram (UK mainland only), although this will always be confirmed separately, as indicated above. Please check the bespoke cutting service page for more information