Oiling Worktops: A Worktop Express® Nutshell Guide
There is no doubt that solid wood worktops look fantastic but they need a bit of loving care – wood is a natural material, after all. The good news is that with a little attention, your worktops will look better than ever before!

The Worktop Express® pre-installation oiling service cuts out a lot of the legwork for you (see below for more information), but if you are planning on oiling worktops yourself or would simply like some top tips from our in-house oiling experts, please read on…
The most vulnerable periods in a worktop’s life are those before installation and immediately after, so we’ve created an intensive how-to-oil guide focusing on these two stages.
How to prepare your DIY worktops for installation with Rustins Danish Oil
- Our worktops are supplied pre-sanded to a 150-grit finish, but sometimes it is worth going over the worktop yourself for an extra smooth surface. Use 120-grit orbital sanders all over, then finish by sanding the top and edges lightly with a pad. This will remove any splinters.
- Rub the top down with a clean cloth to remove any dust.
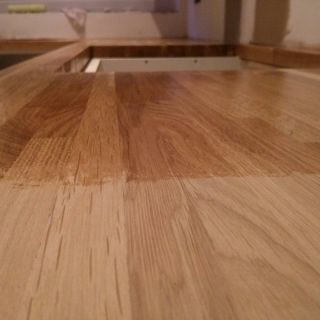
- Once the worktop is completely clean, you can begin to apply Rustins Danish oil, or our own Worktop Express Danish Oil for Worktops. Add a layer to the top and edges paying special attention to the end grain (this tends to be more absorbent than the rest of the worktop and may require extra coats).
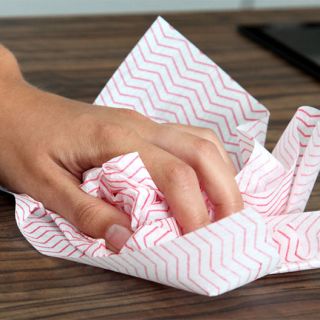
- Wipe down with a new lint-free cloth.
- Flip the worktop over and repeat the procedure, applying a coat to the bottom face and end grain.
- Leave to dry (allow 6-8 hours between coats).
- Repeat the process, turning when necessary and flipping as you go, until three coats have been applied to the top, bottom and sides (6 coats to the end grain).
Achieving a super smooth, silky finish after installation
- Take the denibbing pads that can be found in our DIY Worktop Aftercare Kit and lightly rub the worktop down (the colour may appear slightly duller after this but do not be alarmed: you are temporarily removing a small portion of the oil to start with, this will allow for a silky finish later).
- Rub down the entirety of the top face and exposed side(s) of the worktop, remove any dust with a clean cloth, and leave for an hour or so.
- Repeat the process until the cloth comes away clean. The top should now be completely free of dust and extremely smooth.
- You may now begin to add the finishing coats of oil.
- Begin by applying a small amount of oil to the brush supplied in our aftercare kit (you do not need much – a little goes a long way) and use brush to spread the oil evenly all over the worktop.
- After the surface is completely covered rub down with a clean lint free cloth to make sure oil coverage is even.
- Leave to dry overnight. The best way to test whether the oil is completely dry is to put your hand on the surface and then remove it; if it feels ‘tacky’ or slightly sticky when you pull away, it is not dry.
- Repeat the process – as many times as you desire. The more coats you apply in these early stages, the stronger and more attractive the timber will become.
- After that, it is easy! If you oil regularly for the first six weeks, the worktop will build up oil protection sufficient so that you may leave this and only re-oil once every three months.
- For more information regarding installation and maintenance, please consult our aftercare page.
Read our ‘Guide to Installation & Aftercare‘ to find out more about what you will need to keep your wood worktops looking great for longer.
The Worktop Express® Pre-Oiling Service
Following a period of careful development, we have made some valuable changes to our pre-oiling process. As a company, we have invested heavily in new machinery and system processes to improve the service that we provide. The treatments are applied in an enclosed, specially designated ‘Oiling’ area of our factory, utilising sophisticated machinery to achieve the best finish (with manual checkpoints at several stages to ensure quality). Despite the improvements, there is no additional cost to the price of the pre-oiling service.

The worktops will be perfectly sealed with oil on the top, bottom, edges and end grain. We now use HABiol Oil throughout our pre-oiling service; this product is an ingression oil and as such requires fewer coats to achieve a durable, smooth finish.
As mentioned above, worktops must be treated straight away – that is why our pre-installation oiling service is a mandatory requirement if purchasing another option from our bespoke cutting service (freshly cut timber can be susceptible to movement and therefore immediate oil treatment is required if the wood is to be cut or altered in any way). Our pre-oiling service will ensure that your worktop reaches you in superb condition.
However, if you fancy letting our experts prepare your timbers for you, you are very welcome to opt for this service when simply ordering worktop blanks, too!
Top Tip: Though our pre-oiling service prepares your worktops for installation, your worktops will require regular oiling after installation to keep them in excellent condition (we recommend maintaining with either Rustin’s Danish oil for worktops if utilising our pre-oiling service). You will need to re-oil your worktops with oil immediately after installation and once a month thereafter.
For more information on the two oils and recommended application scenarios, please consult our:
You may also find the following guides useful: