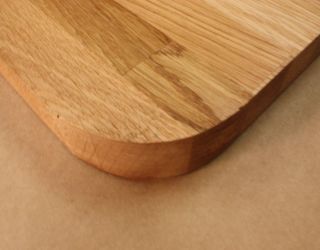
How to Measure Radius Corners
We offer a range of options to help you order your ideal solid wood worktop, but occasionally we need some help from our customers to get things just perfect!
If you opt for the fashionable radius corner option within our bespoke service you may need to supply some measurements (though we also cut to standard supplied manufacturer’s radii). However, if you are trying to match your kitchen worktop to a curved corner already present in your space — say a door or a cabinet — please supply us with the model number and we can do our best to identify the measurements ourselves.
If it does transpire that you will need to supply the measurements for the radius corner, we do advise utilising a measuring square. If you do not have access to this kind of equipment, do not panic — we appreciate that the task can seem a little daunting! Never fear: there are other ways to obtain these measurements. Whatever the worktop — be it a solid oak worktop or beech worktop — Worktop Express® has composed some easy-to-follow instructions for your convenience.
Taking the measurements
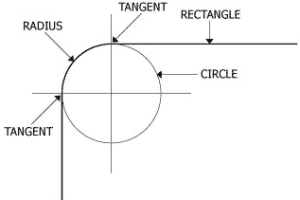
- First, determine the tangent points of the radius. In mathematics, the tangent line is the straight line which makes contact with a curve at only one point; in the case of a circle, the tangent forms a right angle with the radius. More simply, and for our purposes, the tangent points are the locations at which the straight line of the rectangle and the curvature meet (see Diagram 1). You should be able to determine this visually. It would be useful to make a marker of this point on the surface.
- Locate the tangent point of the radius on the edge of the material
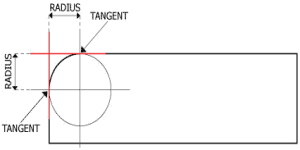
- Lay a flat strip of metal (a metal ruler would be ideal) at right angles to this edge, against the adjacent edge (i.e. in the position of the vertical red line in Diagram 2 [below]). Allow it to extend past the end of the surface.
- Using the flat material as a marker, measure the distance from this marker to the tangent point. This measurement is the outside radius (see Diagram 2 — the marked segment of the horizontal red line indicates the radius measurement you will be taking).
- Check this measurement by performing the procedure in reverse (see Diagram 2 — now place your ruler against the horizontal edge, parallel with the horizontal red line), taking the alternate radius measurement (the radius at right angles to that which you have just determined).
- Repeat several times to confirm that your measurements are accurate (if your current surface is rectangular or square you may wish to check this on all the other corners).
A little note about overhang…
If your worktop has overhang the radius size needs to be increased accordingly, so don’t forget to factor this into your figures! All you need to do is add the desired overhang to the radius.
For example: if you had a 3M X 620mm X 40mm worktop with a curved cabinet on one corner with a radius of 250mm, plus a worktop with 20mm overhang, you will then need to increase the radius size by 20mm. The radius size for your worktop should therefore be 270mm.
If you want to order a worktop featuring radius corners, we recommend the use of our Online Worktop Customisation Tool. This tool makes it incredibly easy to design, price and order custom worktops in any of our timbers, whilst helping to speed-up the entire ordering process, too. Any worktop services ordered through the tool are also subject to a 10% discount, making our customised worktops great value for money.
